Notes CCNA

Set boot file and recover from crash on Cisco switches. Use boot system commands, mode button, and boot loader steps to restore functionality after power loss or software issues.

Alice Edwards
Contributor
4.2
49
4 months ago
Preview (6 of 20 Pages)
100%
Purchase to unlock

Page 1

Notes CCNA - Page 1 preview image

Loading page image...

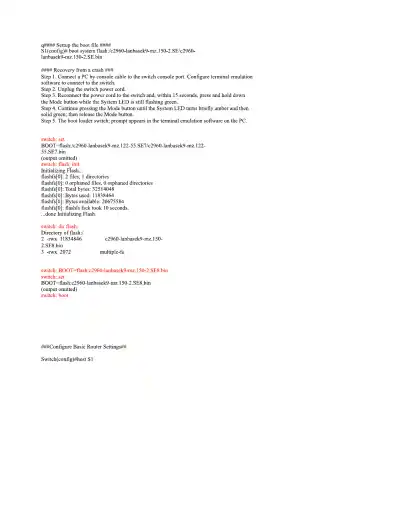
q#### Settup the boot file ####Sl(config)# boot system flash:/c2960-lanbasek9-mz.l 50-2.SE/c2960-lanbasek9-mz.I50-2.SE.bin#### Recovery from a crash ###Step 1. Connect a PC by console cable to the switch console port. Configure terminal emulationsoftware to connect to the switch.Step 2. Unplug the switch power cord.Step 3. Reconnect the power cord to the switch and, within 15 seconds, press and hold downthe Mode button while the System LED is still flashing green.Step 4. Continue pressing the Mode button until the System LED turns briefly amber and thensolid green; then release the Mode button.Step 5. The boot loader switch: prompt appears in the terminal emulation software on the PC.switch: setBOOT=flash:/c2960-lanbasek9-mz.122-55.SE7/c2960-lanbasek9-mz.122-55.SE7.bin(output omitted)switch: flash_initInitializing Flash...flashfs[0]: 2 files, 1 directoriesflashfsfO]: 0 orphaned files, 0 orphaned directoriesflashfsfO]: Total bytes: 32514048flashfs[0]: Bytes used: 11838464flashfsfO]: Bytes available: 20675584flashfsfO]: flashfs fsck took 10 seconds....done Initializing Flash.switch: dir flash:Directoiy of flash:/2 -rwx 11834846c2960-lanbasek9-mz,150-2.SE8.bin3 -rwx 2072multiple-fsswitch: BOOT=flash:c2960-lanbasek9-mz.150-2.SE8.binswitch: setBOOTMlash:c2960-lanbasek9-mz.150-2.SE8.bin(output omitted)switch: boot###Configure Basic Router Settings##Switch(config)#host SI

Page 2

Notes CCNA - Page 2 preview image

Loading page image...

Sl(config)#no ip domain-lookupS1(config)#lin con 0S l(config-line)#logging synchronousS1(config-line)#exec-timeout 0 0Router# configure terminalRouter(config)# hostname R1R1(config)# enable secret class - (password for enable command)R1(config)# line console 0R1(config-line)# password ciscoR1(config-line)# loginR1(config-line)# exitR1(config)# line vty 0 4R1(config-line)# password ciscoR1(config-line)# loginR1(config-line)# exitR1(config)# service password-encryptionR1(config)#[Configure interfaces]R1(config)# interface gigabitethernet 0/0/0Rl(config-if)# ip address 192.168.10.1 255.255.255.0R1(config-if)# ipv6 address 2001:db8:acad:l::1/64R1(config-if)# description Link to LAN 1R1(config-if)# no shutdownR1(config-if)# exitR1(config)# interface gigabitethernet 0/0/1R1(config-if)# ip address 192.168.11.1 255.255.255.0R1(config-if)# ipv6 address 2001:db8:acad:2::1/64R1(config-if)# description Link to LAN 2R1(config-if)# no shutdownR1(config-if)# exitR1(config)# interface serial 0/0/0R1(config-if)# ip address 209.165.200.225 255.255.255.252R1(config-if)# ipv6 address 2001:db8:acad:3::225/64R1(config-if)# description Link to R2R1(config-if)# no shutdownR1(config-if)# exitR1(config)#[Loopback interface]R1(config)# interface loopback 0R1(config-if)# ip address 10.0.0.1 255.255.255.0####Configure switch ports ####[Enable duplex modes]SI# configure terminalSI (config)# interface FastEthernet 0/1SI (config-if)# duplex full

Page 3

Notes CCNA - Page 3 preview image

Loading page image...

Sl(config-if)# speed 100Sl(config-if)# end[auto-MDX (Media Dependent crossover)]S1(config-if)#mdix autoSl(config-if)#duplex auto[should be used with mdix auto]Sl#show controllers ethemet-controller faO/1 phy | include Auto-MDIX[Switch Verification Commands]SI# show interfaces [interface-id]SI# show startup-configSI# show running-configSI# show flashSI# show versionSI# show historyS1# show ip interfaceSI# show mac-address-tableSI# show ipv6 routeSI# show ip route#### SSH Remote configure ###[Change Vian][Setup vlan for management]S3(config)#vlan 99[SVI L3]S3(config-vlan)#name S3S3(config-vlan)#exitS3(config-if)#interface vlan99[set up for L2]S1(config-if)#ip address 172.17.99.11 255.255.255.0S1(config-if)#ipv6 address 2001:db8:acad:99::11/64Sl(config-if)#no shutdownS1(config-if)#exitSl(config)#ip default-gateway 172.17.99.1S3(config)#vtp mode clientS3(config)#Interface range faO/O - faO/24S3(config-if-range)#switchport access vlan 99[SSH setup R and S]SI (config)# hostname R1Sl(config)#ip domain name span.comSl(config)#security passwords min-length 12Sl(config)#crypto key generate rsa general-keys modulus 1024[crypto key zeroize rsa = »Disable]Sl(config)#usemame Huu secret ciscoSl(config)#ip ssh version 2SI (config)# line vty 0 4

Page 4

Notes CCNA - Page 4 preview image

Loading page image...

SI (config-line)# login local[Use local login for username and password]SI (config-line)# transport input sshS l(config-line)#exec-timeout 40Sl(config-line)#login block-for 120 attempts 3 within 60S1(config-line)# exitSI (config)##### DHCP###Step 1 . Exclude IPv4 addresses.Step 2 . Define a DHCPv4 pool name.Step 3 . Configure the DHCPv4 pool.SW2(config)#ip dhcp excluded-address 192.168.1.1 192.168.1.2SW2(config)#ip dhcp pool workdhcpSW2(dhcp-config)#network 192.168.3.0 255.255.255.0SW2(dhcp-config)#default-router 192.168.3.1SW2(dhcp-config)#dns-server 8.8.8.8SW2(dhcp-config)#exitSW2#sh ip dhcp bindingSW2#sh ip dhcp poolSW2#show running-config | section dhcpSW2#show ip dhcp server statistics[Disable and enable]R1(config)# no service dhcpR1(config)# service dhcpR1(config)#[DHCP relay]R1(config)# interface g0/0/0Rl(config-if)# ip helper-address 192.168.11.6Relay DHCP broadcast to DHCP server at 192.168.11.6Port 37: TimePort 49: TACACSPort 53: DNSPort 67: DHCP/BOOTP serverPort 68: DHCP/BOOTP clientPort 69: TFTPPort 137: NetBIOS name service

Page 5

Notes CCNA - Page 5 preview image

Loading page image...

Port 138: NetBIOS datagram serviceStateless DHCPv6 is enabled on a router interface using theipv6 nd other-config-flaginterface configuration command. This sets the O flag to 1.Stateful DHCPv6 is enabled on a router interface using theipv6 nd managed-config-flaginterface configuration command. This sets the M flag to 1. Theipv6 nd prefix default no-autoconfiginterface command disables SLAAC by setting the A flag to 0SLAAC1.Assign GUA, LINk local2.Enable ipv6 routingR1(config)# ipv6 unicast-routingConfigure a Stateless DHCPv6 ServerStep 1. Enable IPv6 routing.R1(config)# ipv6 unicast-routingStep 2. Define a DHCPv6 pool name.R1(config)# ipv6 dhcp pool IPV6-STATELESSStep 3. Configure the DHCPv6 pool.Rl(config-dhcpv6)# dns-server 2001:db8:acad:l::254Rl(config-dhcpv6)# domain-name example.comRl(config-dhcpv6)# exitStep 4. Bind the DHCPv6 pool to an interface.R1(config)# interface GigabitEthemetO/O/1Rl(config-if)# description Link to LANRl(config-if)# ipv6 address fe80::l link-localRl(config-if)# ipv6 address 2001:db8:acad:1::1/64Rl(config-if)# ipv6 nd other-config-flagRl(config-if)# ipv6 dhcp server IPV6-STATELESSRl(config-if)# no shutRl(config-if)# endStep 5. Verify that the hosts have received IPv6 addressinginformation.Configure a Stateless DHCPv6 ClientStep 1. Enable IPv6 routing.R3(config)# ipv6 unicast-routingStep 2. Configure the client router to create an LLA.R3(config)# interface gO/O/1R3(config-if)# ipv6 enableR3(config-if)Step 3. Configure the client router to use SLAAC.R3(config-if)# ipv6 addressautoconfigR3(config-if)# endStep 4. Verify that the client router is assigned a GUA.R3# show ipv6 interface briefStep 5. Verify that the client router received other necessary DHCPv6informationR3# show ipv6 dhcp interface gO/O/1

Page 6

Notes CCNA - Page 6 preview image

Loading page image...

Configure a Stateful DHCPv6 ServerStep 1. Enable IPv6 routing.Rl (config)# ipv6 unicast-routingStep 2. Define a DHCPv6 pool name.Rl (config)# ipv6 dhcp pool IPV6-STATEFULStep 3. Configure the DHCPv6 pool.Rl(config-dhcpv6)# address prefix 2001:db8:acad:l::/64Rl(config-dhcpv6)# dns-server 2001:4860:4860::8888Rl(config-dhcpv6)# domain-name example.comR1(config-dhcpv6)#Step 4. Bind the DHCPv6 pool to an interface.R1(config)# interface GigabitEthemetO/O/1Rl(config-if)# description Link to LANRl(config-if)# ipv6 address fe80::l link-localRl(config-if)# ipv6 address 2001:db8:acad:l::1/64Rl(config-if)# ipv6 nd managed-config-flagRl(config-if)# ipv6 nd prefix default no-autoconfigRl(config-if)# ipv6 dhcp server IPV6-STATEFULRl(config-if)# no shutRl(config-if)# endStep 5. Verify that the hosts have received IPv6 addressinginformation.Configure a Statelful DHCPv6 ClientStep 1. Enable IPv6 routing.R3(config)# ipv6 unicast-routingStep 2. Configure the client router to create an LLA.R3(config)# interface gO/O/1R3(config-if)# ipv6 enableR3(config-if)Step 3. Configure the client router to use DHCPv6.R3(config-if)# ipv6 addressdhcpR3(config-if)# endStep 4. Verify that the client router is assigned a GUA.R3# show ipv6 interface briefStep 5. Verify that the client router received other necessary DHCPv6informationR3# show ipv6 dhcp interface gO/O/1DHCPv6 Server Verification CommandsRl# show ipv6 dhcp poolRl# show ipv6 dhcp bindingConfigure a DHCPv6 Relay Agent1(config)# interface gigabitethemet 0/0/1
Preview Mode

This document has 20 pages. Sign in to access the full document!

Study Now!

XY-Copilot AI
Unlimited Access
Secure Payment
Instant Access
24/7 Support
Document Chat

Document Details

Related Documents

View all